Ansible AWX - GitLab integration
AWX supports SCM integration.
This post will provide a guide on how to setup a connection to a Gitlab repository.
At the end a test will be carried out to ensure AWX is able to checkout from the repository.
Gitlab deploy token
The deploy token approach was used here as it only provides read access to a Gitlab repository.
Create a deploy token
- Navigate to the Gitlab repository
- Head over to Settings from the left menu
- Click on CI/CD

- Then expand Deploy Tokens
Fill in the name.
Leaving Expires at empty - ensures the token never expires; fill this in if access is required temporarily.
For scopes check the option for** read_repository**

Once you click on Create deploy token two fields will become visible - Deploy token username and Deploy token password. Make sure you copy and save these 2 values securely.
Setup Gitlab connection
- Login to AWX as admin
- Navigate to credentials

- Click on the Green plus icon to Create a new credential (on the right)

Fill in the following fields:
- Name
- Description
- Organization
- Credential Type = Source Control
- Username = Gitlab deploy token username
- Password = Gitlab deploy token password
SCM Private key / passphrase can be left empty. The credential will work even without the key info.
Click save to create the credential.
After saving, the new Gitlab credential should show up in the list of credentials.
Testing the Gitlab integration
With the new Gitlab credential setup in AWX, it’s now time to test the connection.
Create a new inventory
Navigate to Inventories
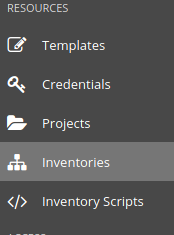
- Click on the Green plus icon to create a new inventory

- Fill in the name
- Description
- Organization
As this is a test inventory, adding hosts are not required.
Click on save.
Create a new project
Navigate to Projects
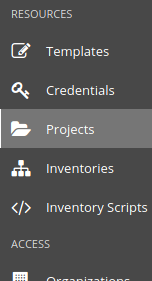
- Click on the Green plus icon to create a new project

- Fill in the name
- SCM type = Git
- SCM URL = your Gitlab repository .e.g. https://gitlab.com/
/ .git - SCM credential = select the Gitlab credential you saved in AWX earlier
- Organization = select the correct Organization you require this Project to be associated with
- SCM branch/tag/commit/update/refspec = optional
Click save.
Create Job template
Navigate to templates.

- Click on the Green plus icon to create a new template

- Fill in the name
- Description
- Job type = Check (this will only check the syntax of the playbook)
- Inventory = select the one you created in the earlier step
- Project = select the one you created in the earlier step
- Playbook = select the path to where the <main>.yml file is located in the repository
Click on save, then launch the template.
SCM check output
Once the Job template has launched.
Navigate to Jobs, 2 jobs should be visible
-
Job1 - is the SCM update
-
Job2 - is the Playbook run (in this case this is only a syntax test as we chose to only Check in the Job template)
Open Job1 - since this is the SCM test.
If successful you should see the console output similar to the following, which demonstrates that the git checkout was OK.
  PLAY [Update source tree if necessary] *****************************************
  TASK [update project using git] ************************************************
  ok: [localhost] TASK [Set the git repository version] ******************************************
  ok: [localhost] TASK [Repository Version] ******************************************************
  ok: [localhost] => { "msg": "Repository Version adfb3f696604e6b4f48a0bc4fbbeb6d82c8667ee" }

  PLAY [Install content with ansible-galaxy command if necessary]
  *****PLAYRECAP*********************** localhost : ok=3 changed=0 unreachable=0 failed=0 skipped=0 rescued=0 ignored=0